Intarsia knitting is a knitting technique that allows to knit actual pictures or abstract designs. The key is that multiple colors are used in each row and the colors are never stranded across the back of the work, as they are in Fair Isle knitting (or stranded knitting). Each color change uses a separate length of yarn. Usually intarsia designs are knitted in stocking stitch (stockinette). The resulting fabric is single thickness with lots of loose ends to finish off from each different color change.
Intarsia Knitting How To
If you are new to intarsia knitting, but you already know the other basics how to knit, purl and do a stocking stitch, you can get started with this helpful how-to video with Edie Eckman.
How to read an intarsia design?
Intarsia designs are always drawn out on a chart. The chart is read starting with a knit row, from the bottom right-hand corner. Knit rows are read from right to left and purl rows are read from left to right. Therefore, odd numbers are found on the right-hand side and even numbers are on the left-hand side.
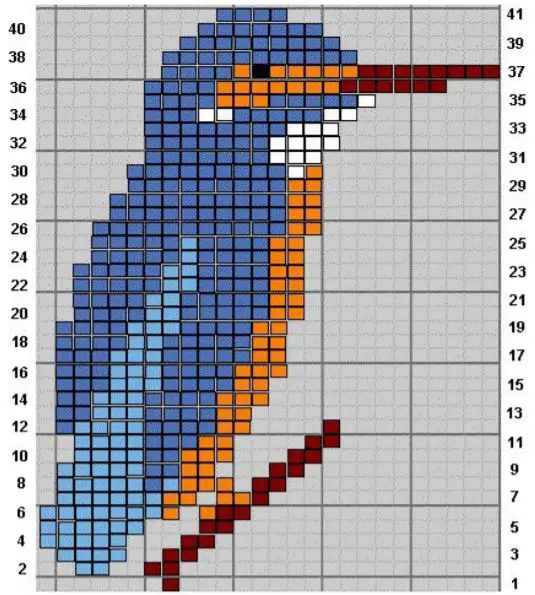
If you were to knit the kingfisher design above, then on row 1 of the design you would need to introduce a second skein of the background color to take over after the first stitch of the twig the kingfisher is standing on. On the second row that second skein of background would knit up to the kingfisher’s tail and another short length of background color would be needed to fill the gap between the tail and the twig.
New colors are brought in from below the existing color and knitted as normal. On the next row make sure to twist the old and the new color around each other in order to ensure there are no holes. As you are knitting you may want to wind a few yards of each color onto a bobbin to hang at the back of the work. Or you can wind up small bobbins on your fingers to pull from the inside to keep the yarns tidy.
It’s important to keep the different colors separate from each other, or they will soon twist and tangle and be unworkable.
Tip: When you knit with several colors of yarn keep them separate and untangled by using small amounts of color wound onto bobbins.
To wind bobbins on your fingers: leaving an end about 6 inches long, wind the yarn into a figure of eight around your thumb and little finger (pinkie). Cut the yarn from the ball and use the end to tie round the figure of eight. You can then work the color using the long end and it will unravel from the middle.
Always keep the tail ends of the yarn at the back of the work. When you have finished knitting the piece it will be necessary to darn in all the loose ends. These can be threaded up the join between two colors or woven in so as not to show on the front. Where you have started and finished a color there may be a small hole, use the ends to close up any of these holes as you darn them in.
Tip: Don’t attempt to knit intarsia in the round. By the second time round the ends of your colors will be on the wrong side of the work and will have to be cut and rejoined in.
Creating your own Intarsia designs
You can create your own pictures to knit by drawing them out on special knitting graph paper. Please do not use ordinary graph paper or your design will knit up out of proportion. Knitting stitches are rectangular, not square, so it is important to create your design on rectangular graph paper.
Tip: Here you can download rectangular graph paper free from my website.
Once you have the rectangular graph paper you can either draw your design straight onto the paper or find an image you want to knit and trace round it onto the paper. I find it helps to hold the picture I want to copy up against a window in daylight to do the tracing.
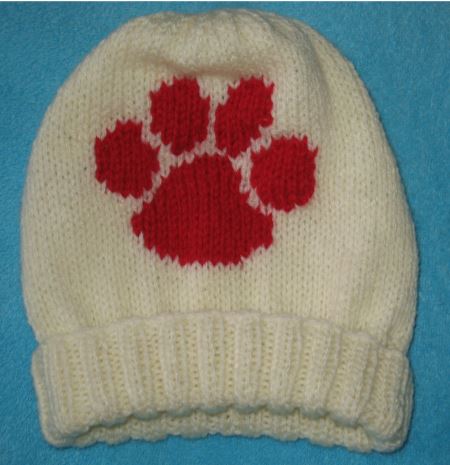
You then need to ‘square off’ the design. Where you have drawn diagonal lines or curves they will not sit exactly on the grid of the graph paper. You will need to work round each area of color making it fit to the rectangles that represent each stitch. In this way you will create a knitting chart you can follow to create your design. This was exactly the process I used to create the kingfisher design above and the bear paw below.
Tip: When following a chart pattern take a photocopy and mark off each row as you complete it. Or place the chart in a plastic wallet and mark off each row on the plastic wallet. This keeps the original pattern clean and helps you keep your place as you knit.
Here is the pattern to knit up the bear paw hat:

Check out our post about the bear paw hat to see the full knitting instructions.
Free Intarsia Charts
If you want to create your own intarsia knitting designs then we have all the tools you might need here at The Knitting Site. Our KnitPro Plus software will take any picture file (jpg, gif or png) and convert it into a knitting design. I have also created some intarsia designs which you are welcome to download and use in your own knitting: